Skip to product information
1 of 10

Wallbox Pulsar Pro 22 kW Socket

Wallbox Pulsar Pro 22 kW Socket

Regular price €899,00 EUR
Regular price Adviesprijs: €999,00 EUR Sale price €899,00 EUR
Sale Sold out
Tax included. Shipping calculated at checkout.

Low stock

Order before 9 PM, free shipping today

Waarom kiezen voor ons?

Op werkdagen voor 21:00 uur besteld, vandaag verzonden*

Gratis verzending in Nederland & België

30 dagen bedenktijd

Ophalen mogelijk

Achteraf betalen mogelijk

Plus- en minpunten

  • Ondersteuning voor facturatie, ideaal voor zakelijke gebruikers.
  • Hoog laadvermogen tot 22 kW.
  • Zeer geschikt voor gedeeld gebruik, bijvoorbeeld op kantoorlocaties.
  • Geïntegreerde Wi-Fi, Bluetooth en Ethernet.
  • Hogere aanschafprijs.
  • Product Description

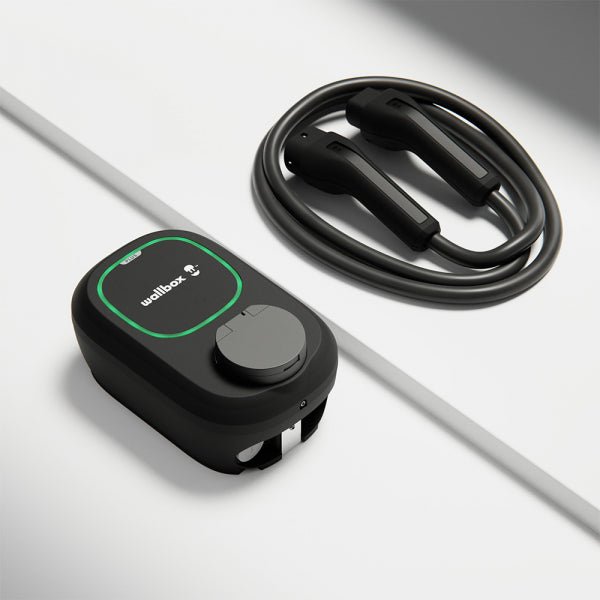
    Discover the Wallbox Pulsar Pro Socket, designed to make charging your electric car or plugin hybrid simple and efficient. With a power output of up to 22 kW and the ability to adjust the charging current between 6A and 32A, this charging station is suitable for any situation

    This charging solution has an RFID reader, allowing you to charge with a charge card. Also included is a 4G SIM card, with which the charger connects to a back office. This allows you to monitor consumption, manage charging sessions, and – if desired – apply automatic billing.

    Use the Eco-Smart function to make optimal use of your solar energy and manage your charging station effortlessly via the myWallbox-portal and the Wallbox-app. With schedulable charging sessions, you can reduce your energy costs by charging during off-peak hours. The socket/outlet provides a tidy appearance and allows for charging of various types of electric cars.

    The Power Sharing Smart function intelligently distributes power between multiple chargers, while the optional Power Boost function ensures faster charging without worries about overload.

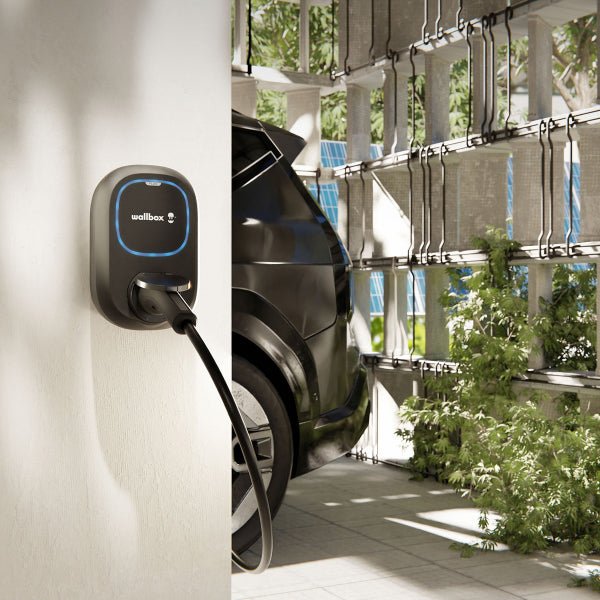
    This modern charging station is suitable for both indoor and outdoor use and comes with a simple installation procedure and a 3-year warranty for peace of mind.

    Through us, you receive a standard two-year manufacturer's warranty on this product. This means you can enjoy a perfectly functioning product for two years without worries. If a defect occurs within this period due to a manufacturing or material fault? No worries, the manufacturer will ensure this is resolved for you free of charge.

    The warranty is handled directly by the manufacturer. This means you can count on the expertise and fast service of the brand itself, so any problems are resolved quickly and efficiently.

    Do you have questions or want more information? Our friendly customer service team is always ready to help you!


    User Manual

    Pulsar Pro – Online Installation Guide

    1. Technical Specifications

    General Specifications

    Charging Mode (IEC 61851-1) Mode 3
    Dimensions without cable 198x201x99 mm (without cable)
    Weight without cable 1.3 kg (without cable)
    Operating Temperature -30 ºC to 50 ºC
    Storage Temperature -40 ºC to 70 ºC
    Environmental Ratings IP55, IK10 (High resistance)
    Installation Place Indoor and outdoor use
    Mounting Type Fixed equipment fastened to the wall. Floor-standing installation with appropriate Wallbox accessories.
    Intended for Use Equipment intended for use by ordinary persons.
    Location of Access Equipment for both unrestricted and restricted access locations.
    Standards CE, UKCA, EAC, and RCM mark. IEC 61851-1, IEC 61851-21-2, IEC 62196, BS 7671, IEC 60364. RED Directive 2014/53/EU and RoHS Directive 2011/65/EU
    *Complies with UK Smart Charging Regulations

    Electrical Specifications

    Charging Power 7.4 kW (1P) 11 kW (3P)* 22 kW (3P)
    Rated Voltage AC ± 10% 230 V 400 V 400 V
    Rated Current 32A 16A 32A
    *22kW charger limited to 11kW during installation


    Configurable Current From 6A to rated current
    Rated Frequency 50 Hz / 60 Hz
    Rated Diversity Factor (RDF) 1
    Rated Insulation Voltage 400 V
    Rated Diversity Factor CAT III
    Rated Impulse Withstand Voltage 4000 V
    Overvoltage Category DC 6mA
    RCCB Type A, B or EV may be required according to regional regulations
    Protection Against Electric Shock Class I
    Cable Section Up to 13 mm²
    Connection of Power Supply Equipment EV AEVCS permanently connected to the AC grid
    Pollution Degree PD3
    Electromagnetic Environment Class A + Class B

    2. Safety Warnings

    Veiligheidswaarschuwingspictogrammen
    • Flying debris, risk of eye injury
    • Risk of electric shock.
      Disconnect and wait 10 minutes.
    • Caution
    • Sharp element, risk of cuts
    • Earthing connection required
    • Special waste disposal

    3. Tools and Mounting Parts

    Required Tools

    gereedschap & montageonderdelen
    • Hammer
    • Step drill 32mm and drill bit 8mm
    • Pencil
    • Flat screwdriver
    • Phillips screwdriver
    • Cutting pliers
    • Torx T20 and T15
    • Measuring tape
    • Utility knife
    • Spirit level

    Included Mounting Parts

    • Phillips screws ø6 x 50 mm
    • Phillips screws ø5 x 40 mm
    • Wall anchors ø8 x 40 mm
    • M32 gland
    • Torx screws T20 4 x 10 mm
    • Torx screws T15 ø3.5 x 8 mm

    4. Preparing the Charger

    Remove the two corner screws and carefully lift the cover. Then, gently disconnect the ribbon cable and set the cover aside.

    Switch off all connections before proceeding with the installation.

    5. Installing the Wall Plate

    Remove the tape from the wall plate to detach it from the charger. Then, level it and mark three holes with a pencil. Now, drill with a drill bit of the appropriate size and align the wall plate with the holes.

    If you are attaching your charger to a solid wall, use the wall anchors provided with your charger.

    Mount the wall plate to the wall, being careful not to overtighten the screws.

    If the power supply wiring comes from the wall, you must thread the wires through the hole in the wall plate before attaching the wall plate.

    6. Lower Connection

    Both lower and rear connections are possible when installing Pulsar Pro. If you wish to install the product using the lower hole, please follow the instructions below. For rear connection, please proceed to chapter 7.

    Lift your charger and hang it from the top of the wall plate. Fasten the charger to the wall plate using the appropriate screws, being careful not to overtighten them.

    Make an incision in the gland and feed the power supply cable.

    7. Rear Connection

    Make a hole in the back of the charger with a 32mm Step drill. Then, make an incision in the gland and feed the power supply cable.

    Fasten your charger to the wall plate and secure it with the appropriate screws.

    Go to the EMS Installation Guide to discover which functionalities are supported by Pulsar Pro.

    8. Electrical Wiring

    Single-Phase Version

    • Single-Phase Setup
    • Bi-phase No neutral
    • Single-Phase PME

    (UK only) Can be connected to the PME supply in accordance with BS7671:2018-amd1:2020 722.411.4.1

    Three-phase Version

    D. Three-phase setup

    E. Three-phase no neutral

    F. Bi-phase setup

    For three-phase No Neutral installation check compatible EV models supporting this configuration.

    The Pulsar Pro three-phase version can be installed with A – B setups.

    Make sure the maximum voltage between L & N inputs is lower than 264V.

    9. Closing the charger

    Set the power selector switch to an appropriate setting. Then carefully reattach the communication cable to the charger’s cover and close it.

    Make sure the selector is not on 0, 8 or 9. 

    Place the four corner screws to secure the charger’s cover. Make sure to properly align the bottom screw opening, place the decorative frame on your charger and secure the frame with the screw. Do not overtighten.

    10. Installing the plug holder

    Place the plug holder on the wall and mark the fixing points. Then drill holes where the fixing points are marked.

    Insert the anchor screws into the fixing holes. Then fix the device to the walls by inserting and tightening the screws.

    11. Registering the charger

    Download the Wallbox app and register.

    View full details
  • Effortless

    Multiple

    Users

  • Easy management and control. The improved Pulsar charger has been specifically designed for multi-user locations and business settlements.

Why Pulsar Pro?

Reliable

Integrated 4G and enhanced ruggedness for high availability, without interruption.

Simple

Simple authentication with RFID, NFC, and the Wallbox app.

Protected

Encrypted communication to keep personal data private.

  • Faster installation

    Shorter commissioning time with pre-configured 4G data plan.

  • Remote Management

    Wallbox Business Portal and OCPP compatibility for charger management, payments, and more.

  • Improved Service & Maintenance

    Enhanced security to prevent tampering, damage, and cyberattacks, plus seamless over-the-air software updates.

1 of 3
  • Energy Management

    Your charging system is now also an energy management solution.

  • Unlock the full potential of the Pulsar Pro with a Wallbox energy meter and our built-in energy management features.

  • Dynamic Power Sharing for multiple

    Detect the available power in your building and automatically distribute it among all connected vehicles. Upgrade to Sirius Energy Intelligence at any time.

    Up to 100 chargers
    No peak overload
    No expensive upgrades

  • Sirius Energy Intelligence

    Enjoy more flexibility and scalability with options to combine different charger types, ultimately lowering capital and operational costs. Automatically balance energy consumption between chargers and building consumption.

    Combine AC and/or DC chargers
    Prevent grid overload and expensive energy upgrades
    Works on separate circuits and local networks

FAQs

Yes! Wallbox has options for Type 1 and Type 2 vehicles. Our Pulsar family is compatible with every hybrid and electric car.

Absolutely! Through our app, you can create, delete, and edit scheduled charging sessions for your Wallbox charger, regardless of your location. Whether you are near the charger and using Bluetooth or accessing it remotely via Wi-Fi or 4G, you are covered. With the Wallbox app, you get the ability to check the status of your charger and schedule charging for periods with low energy costs. Ready to get started? Download the Wallbox app from the Apple App Store or Google Play Store.* (depending on the OCPP software you use)

More information about the Wallbox app

The Wallbox platform provides your organization with the necessary tools to efficiently manage multiple chargers and monitor energy consumption. Additionally, our on-site experts conduct an assessment to provide you with an optimal configuration that minimizes infrastructure costs and maximizes the number of charging points.

Learn more about business software solutions.